
The mirror repeat is the workhorse behind damask wallcoverings, Persian-rug medallions, kaleidoscope prints, and almost every ornamental border that needs to feel formal. This mirror repeat tutorial walks through what the structure actually does to the math of a tile, when symmetry helps a design and when it kills it, and how to build one cleanly in Illustrator, Photoshop, and Procreate without inheriting the seam problems that drop-shift repeats let you ignore.
Most repeat tutorials online treat mirror as a footnote at the bottom of an article about half-drop or block repeats. That is a mistake. Mirror repeats behave differently from the moment you start drawing the source motif, they fail differently when printed, and they require a different test method to confirm the tile is clean. Treating them as a variant of a standard block repeat is the fastest way to end up with a wallcovering that looks fine on screen and visibly fractured on the wall.
What a mirror repeat actually is
A mirror repeat (also called a mirrored pattern repeat, reflected repeat, or symmetry repeat) takes a single tile and flips it across one of its edges to generate the next tile. The reflection can be horizontal, vertical, or both. When both axes are mirrored, you get four-way symmetry — the structure underneath every kaleidoscope motif and most formal damask wallpapers.
Compared to a standard block repeat, where the same tile is duplicated edge-to-edge without flipping, mirror has one defining property: the seam line between two tiles is always identical to itself. If tile A's right edge is a curve climbing from lower-left to upper-right, the mirrored tile's left edge is the same curve climbing from lower-right to upper-left. They meet perfectly because they are literally the same pixels reflected. This is what makes mirror so forgiving for beginners and so unforgiving for designers who want naturalistic, asymmetric motifs.
The trade-off: every element in the source tile appears twice (or four times) in every repeat cycle, and the reflection axis runs straight through the center of the pattern at regular intervals. The eye notices that axis. It either reads as deliberate formal symmetry — the desired effect for ornamental work — or as an obvious vertical/horizontal line cutting through the field, which is what you want to avoid.
For a refresher on how mirror sits alongside the other repeat structures, the seamless pattern maker and ai pattern generator pages walk through block, half-drop, brick, and diamond layouts in the same vocabulary used here.
When mirror is the right choice
Mirror repeats belong on four specific kinds of design:
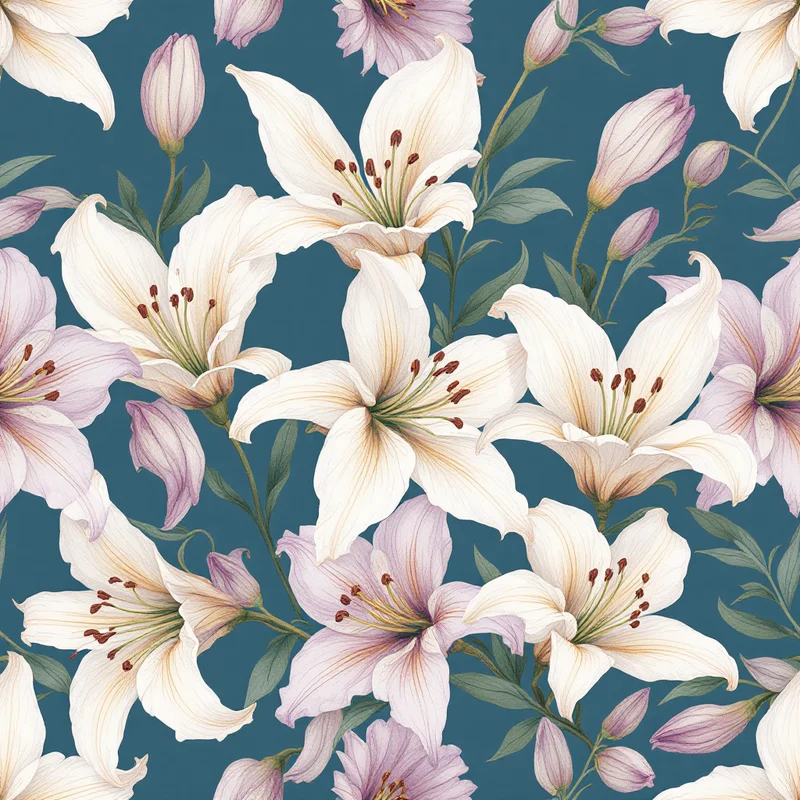
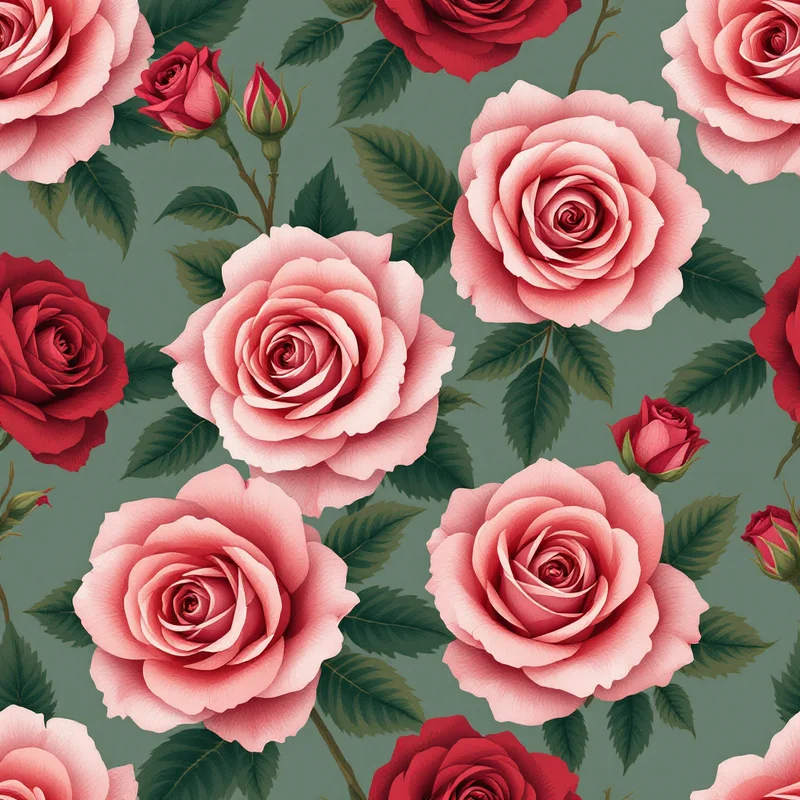
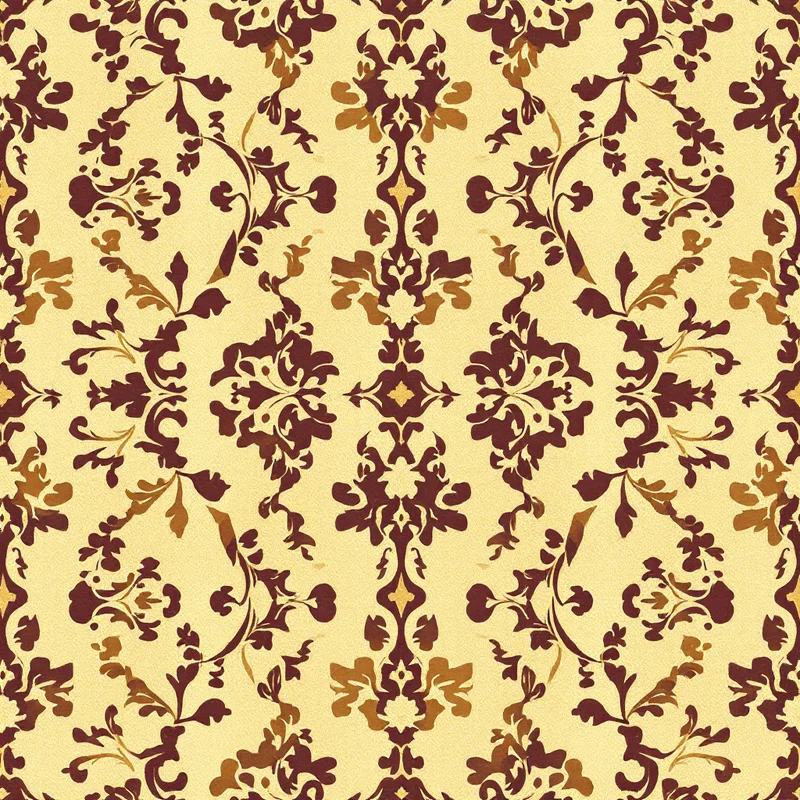
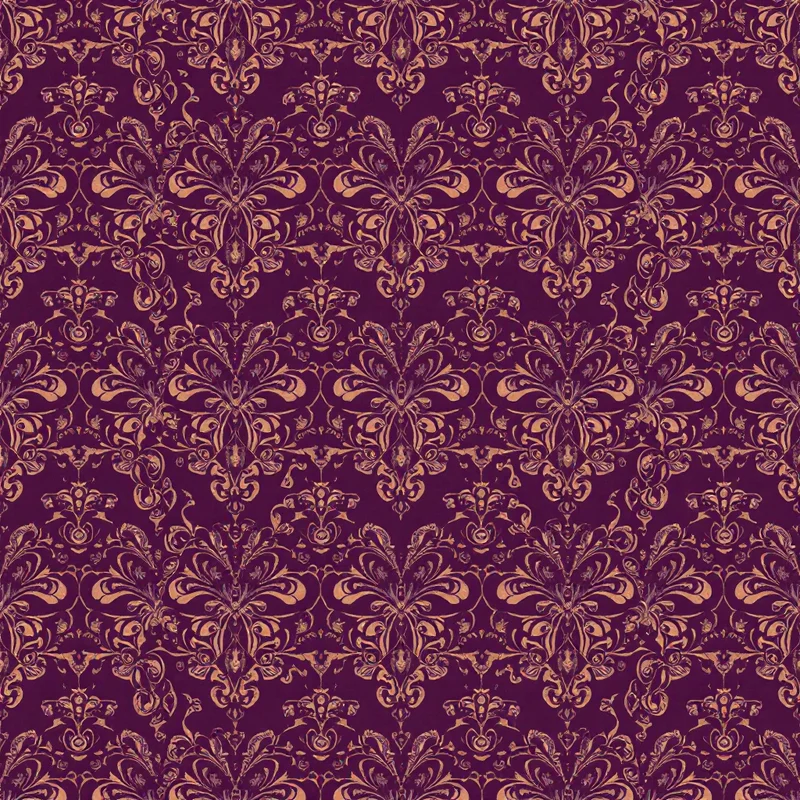
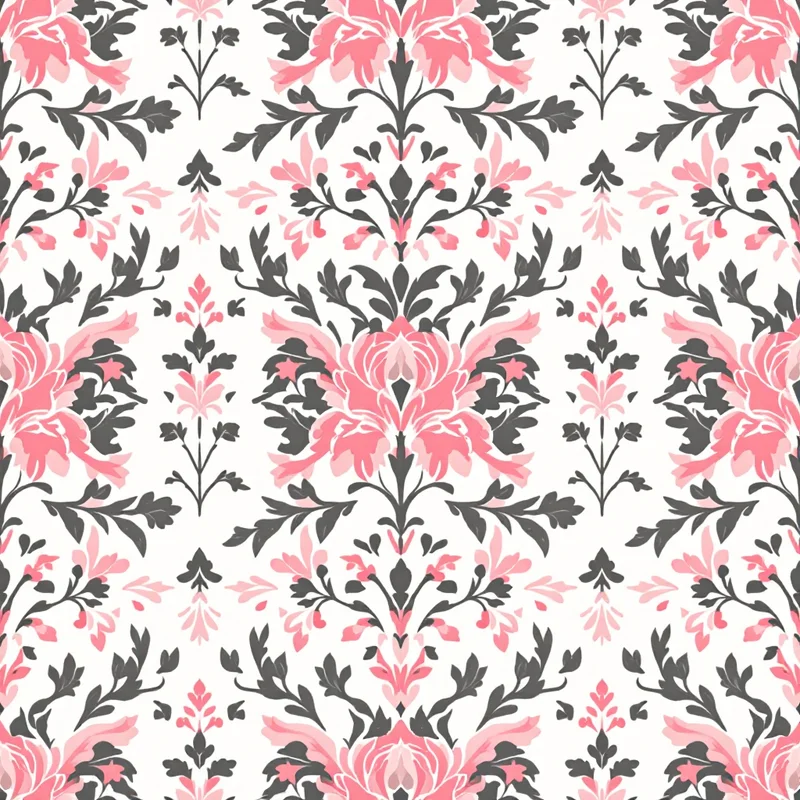
Damask wallcoverings and upholstery. The entire damask tradition — Italian Renaissance silks, French Empire panels, Victorian flock wallpapers — is built on vertical mirror symmetry. A damask motif is typically a vertical pendant (urn, cartouche, palmette, fleuron) reflected across a central vertical axis. Without that mirror line, the form reads as a botanical print, not as damask.
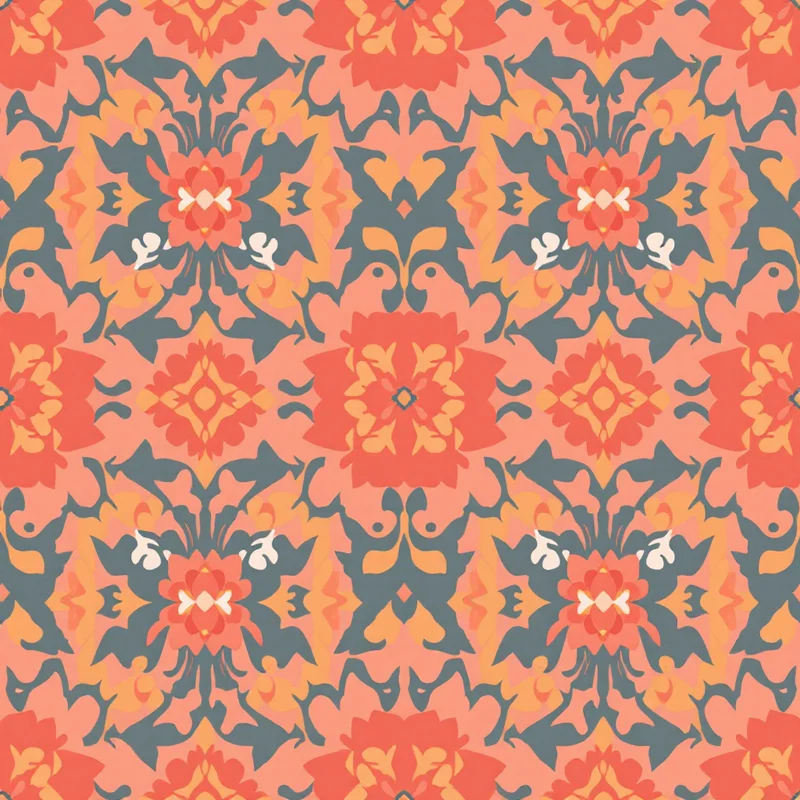
Kaleidoscope and medallion patterns. Four-way mirror symmetry is the underlying geometry of every kaleidoscope. Mandala, rose-window, and Persian medallion designs lean on the same structure: a wedge of the tile is mirrored across both axes to generate the full motif.
Persian-rug-style symmetrics. Traditional Persian and Anatolian rugs use bilateral symmetry around the field's central axis. The border is usually a non-mirrored running pattern, but the field itself — the central medallion, the corner spandrels, the secondary motifs — is mirrored. If you are designing rug-influenced prints for upholstery or home textiles, mirror is the structural starting point.
Ornamental borders and trims. A border that reads as architectural — egg-and-dart, Greek key variants, scrollwork — almost always uses horizontal mirror reflection. The vertical axis of each repeat unit is a mirror line, which is why classical borders feel "anchored" rather than directional.
Outside these four categories, mirror tends to fight the design. A floral toss meant to read as a scattered hand-drawn meadow will look like cut-and-pasted clones the moment you mirror it. A geometric grid pattern with clear directional motifs (chevrons, arrows, slanted stripes) becomes visually contradictory because half the motifs are flipped. For anything where you want the pattern to feel organic, varied, or directional, half-drop or random-toss layouts beat mirror every time. The textile design overview has the full decision tree.
A short historical note
Damask gets its name from Damascus, where mirror-symmetric silk weaving traditions spread through the Mediterranean during the medieval Silk Road period. The structural reason for the symmetry was originally technical: drawloom and later jacquard mechanisms could weave a mirrored repeat with roughly half the punch-card storage required for an asymmetric one. The weaver punched cards for half the motif and the loom hardware generated the reflection mechanically.
That technical efficiency hardened into a stylistic convention. By the time mirror weaving was no longer mechanically necessary — early 20th century, when fully asymmetric jacquard production became routine — the symmetric look had become synonymous with "formal," "high-end," and "traditional." It is still the visual shorthand for luxury wallcoverings, hotel upholstery, and heritage fashion houses today. When a textile designer describes a print as having a "damask feel," they almost always mean the mirror axis, not the specific motif.
Persian and Central Asian carpet design has a parallel history. The central medallion of a Tabriz or Kashan rug is built on quadrilateral mirror symmetry because the cartoon (the master drawing the weavers worked from) was traditionally drawn for one quarter of the field, then mirrored. Same principle: technical economy that became aesthetic convention.
Strengths and weaknesses
The strengths of a mirror repeat are concrete:
- Seamless edges are automatic. Because the seam between tiles is the same line reflected, there is no edge-blending problem. This is the single biggest practical reason to choose mirror.
- Formal authority. Symmetry reads as deliberate, considered, architectural. For luxury or heritage product positioning, this is exactly the visual register you want.
- Print-stable. Mirror repeats tolerate misalignment in roller and rotary printing better than directional repeats. A small registration error on a mirror print typically reads as a slight thickening of the mirror line, not as a broken motif.
- Scale-flexible. Because the motif is anchored to a central axis, you can scale a mirror repeat up or down for different products (wallpaper, cushion, scarf) and the composition still reads as intentional.
The weaknesses are equally concrete:
- Visible reflection lines. The mirror axis is always there. If the motif crosses the axis with a strong horizontal element, the reflection seam becomes a visible band running through the design.
- Clone problem. Every shape appears at least twice. Anything that read as a unique focal point in the source tile is now duplicated, which can drain the eye away from the motif.
- Directional motifs fail. Tigers, birds, hands, text, arrows — anything with a clear orientation — produces an obvious cut-and-paste effect when mirrored.
- Compositional rigidity. The axis dictates where major elements have to sit. You cannot move the main motif off-center without breaking the symmetry the whole structure depends on.
The general rule: if the pattern wants to feel formal, ornamental, or architectural, mirror is the right structure. If it wants to feel scattered, naturalistic, or directional, choose half-drop or random toss instead.
Step-by-step in Illustrator
Illustrator handles mirror repeats natively through Pattern Editing Mode, but the workflow is not the default behavior. You have to set it up correctly from the first step.
- 1Set up the artboard at half the final tile dimensions. If the finished repeat tile needs to be 12 inches square, draw on a 6-inch-wide by 12-inch-tall artboard. You are building half the tile; Illustrator will generate the other half.
- 2Draw the motif against the right edge of the artboard. That right edge is the future mirror axis. Anything that crosses it will be reflected across the seam.
- 3Place a vertical guide one pixel inside the right edge. Snap any element that crosses the axis to this guide. Half-pixel snaps produce blurry mirror lines after rasterization.
- 4Select the artwork and choose Object → Pattern → Make.
- 5In the Pattern Options panel, set Tile Type to "Brick by Column" with a Brick Offset of 1/2. This is not the mirror setting yet — set tile type to "Grid" first, then convert to mirror in the next step.
- 6Set Width to double the artboard width. Illustrator will now show two copies of the artwork side by side.
- 7In the Overlap controls, click "Reflect" on the left-edge tile. This is the actual mirror command. The neighboring tile flips horizontally.
- 8Add the vertical mirror by repeating the reflect setup on the top edge if you want four-way symmetry.
- 9Click Done in the top bar. The swatch is now in the Swatches panel and applies as a fill to any shape.
The most common Illustrator mistake is drawing the motif centered on the artboard instead of pushed to the right edge. Centered artwork in Pattern Editing Mode produces gaps in the mirror — the reflected tile shows the empty left side of the source tile, not the mirrored motif. Always anchor the motif against the future mirror axis.
For more detailed Illustrator workflows applied to apparel-specific use cases, the how to design clothing patterns tutorial covers the seam-checking process in production-ready depth.
Step-by-step in Photoshop
Photoshop does not have a true mirror repeat mode the way Illustrator does. The workflow is manual but reliable.
- 1Create a new document at the final tile dimensions. For a 12-inch by 12-inch repeat at 300 DPI, that is 3600 by 3600 pixels.
- 2Add two vertical guides at 50% and a horizontal guide at 50%. These are your mirror axes.
- 3Work in the upper-left quadrant only. Draw the motif so that any element touching the right edge of the quadrant (the future vertical mirror) is flush against the guide.
- 4Duplicate the quadrant layer, then Edit → Transform → Flip Horizontal. Drag the flipped copy to the upper-right quadrant. Use Snap to Guides to align it precisely.
- 5Merge the two upper quadrants into one layer. Duplicate that layer, Flip Vertical, and drag to the bottom half.
- 6Run Filter → Other → Offset with horizontal and vertical values both set to half the tile size. This shifts the tile so the seams move to the center of the canvas, where they are visible for inspection.
- 7Examine the now-visible seams at 100% zoom. Because mirror seams are mathematically identical lines, you should see no discontinuity at all. If you do, you accidentally extended an element past the mirror axis during step 3. Go back and fix it.
- 8Run Offset again with the same values to return the tile to its original orientation. Save as a Pattern (Edit → Define Pattern) for use as a Pattern Overlay layer style.
The Photoshop method has one advantage over Illustrator: you can paint or texture-brush across the mirror line and let the duplicate-and-flip step generate the reflection. This is valuable for painterly damask work where you want the brushwork to feel hand-applied. Just remember to do all painting in the upper-left quadrant only — anything painted after the quadrants are merged breaks the symmetry.
Step-by-step in Procreate
Procreate added Symmetry Drawing Guides in version 5, which makes mirror work the most direct of the three apps for hand-drawn designs.
- 1Set up canvas at final tile dimensions. 3000 by 3000 pixels at 300 DPI works for an 10-inch tile and stays well under Procreate's layer limit.
- 2Open Actions → Canvas → Drawing Guide and toggle it on.
- 3Tap Edit Drawing Guide and select Symmetry from the bottom row.
- 4Choose Options → Quadrant for four-way mirror, or Vertical for damask-style single-axis mirror.
- 5Toggle "Assisted Drawing" on for the current layer. Every brush stroke now mirrors across the selected axes in real time.
- 6Draw the motif normally. The mirror reflection updates as you draw. This is the fastest way to build damask source artwork in any of the three apps.
- 7Flatten the layer and export as PNG at full canvas resolution.
- 8Test the repeat in a desktop app — Procreate does not show edge-tiled previews, so move the finished tile into Photoshop or Illustrator and use the Offset method described above to inspect the seams.
The Procreate workflow is the most natural for designers who think in brush strokes rather than vector points. The catch is that mirror in Procreate only mirrors within the canvas — it does not generate the tile-to-tile seam automatically the way Illustrator's Pattern Editing Mode does. The exported PNG is one finished tile; the actual repeat behavior happens when you bring it into a tiling tool.
Tools that handle mirror automatically
For anyone who wants to skip the manual axis setup entirely, generative tools now handle mirror as a structural parameter. The fabric pattern generator and surface pattern design workflows on Pattern Weaver let you select repeat structure (block, half-drop, brick, or mirror) before the source motif is generated, so the symmetry is built into the design from the first pass instead of imposed afterward.
The advantage of the generative approach is that the underlying motifs are designed for the symmetry rather than retrofitted to it. A mirrored damask generated this way will have urns, cartouches, and acanthus leaves that were intentionally drawn against a vertical axis, rather than asymmetric motifs that were mirrored after the fact and have to be cleaned up at the seam. The create cultural patterns and create floral patterns endpoints both default to mirror structure when the style cues call for damask, Persian, or formal ornamental work.
For comparison-shopping across the broader category, the fashion print design guide and design patterns for Spoonflower posts cover the print-production handoff for both manual and generative workflows.

How to test the repeat
A mirror repeat that looks perfect at the tile level can still fail in production. The test sequence is non-negotiable:
1. Nine-tile preview. Place the tile in a 3-by-3 grid at the actual print size. Mirror repeats fail most often at the corners where four tiles meet — that intersection is the meeting point of two mirror axes and any small error compounds. View at 100% zoom and inspect the four-corner meeting point.
2. Print at production scale. A 12-inch tile that looks clean on a 27-inch monitor can show banding when printed onto 56-inch fabric and viewed at arm's length. Print a single yard test before committing to the full run.
3. Step away from the print. View the printed test from 6 feet, then 12 feet. The mirror axis lines will become more visible at distance, not less. If the axis is too pronounced at 12 feet, the source motif needs more elements crossing the axis to break up the line.
4. Rotate the test 90 degrees. Vertical mirror axes that read fine running top-to-bottom often look wrong running left-to-right. Always confirm the design works in both orientations if the end use might involve garment rotation or upholstery direction changes.
5. Check against the substrate. Mirror prints on shiny substrates (satin, glossy wallpaper, ceramic) make the axis lines more visible because of specular reflection. Matte cotton or linen forgives small mirror imperfections that gloss would expose.
For a full step-by-step on production handoff, including the file formats and color modes that printers actually want, the clothing design and fashion print design walkthroughs cover everything from the test tile through the press check.
Quick decision guide
If you can answer yes to most of these, mirror is the right repeat structure:
- The end product is wallpaper, upholstery, formal apparel, or scarves.
- The visual register should read as ornamental, architectural, or heritage.
- The motifs are non-directional (florals, scrollwork, abstract ornament, medallions).
- The print substrate is matte or low-sheen.
- Production registration tolerance is loose (rotary or roller printing).
If you answer no to most, choose half-drop or random toss instead. For directional graphics, technical motifs, or anything meant to feel hand-drawn and varied, the symmetry will work against you rather than for you. The mirrored pattern repeat is a specific tool for a specific job — used in its lane, it is the strongest repeat structure available; pulled outside that lane, it is the most visually problematic.
Get the structural decision right at the start of the project, build the source motif against the mirror axis from the first sketch, and the rest of the production process becomes a matter of execution rather than rescue.
Explore related pattern styles
Patterns for