The half-drop repeat is the most-used layout in commercial textile design, and this half-drop repeat tutorial breaks down why. It hides the grid that a straight block repeat exposes, it carries florals and ditsies without the eye catching the seam, and the math behind it is one line: offset equals tile height divided by two. Once that click happens, most of the layouts you see on bedding, dresses, wallpaper, and upholstery stop looking like magic and start looking like a pattern you can reverse-engineer.
This walkthrough covers what the half-drop is, when to reach for it instead of a block or brick, the offset math, and how to set it up in Illustrator, Photoshop, and Procreate. It also covers the failure modes that get patterns rejected by print partners: uneven offsets, motif clipping at the edges, and scale that fights the repeat instead of supporting it.
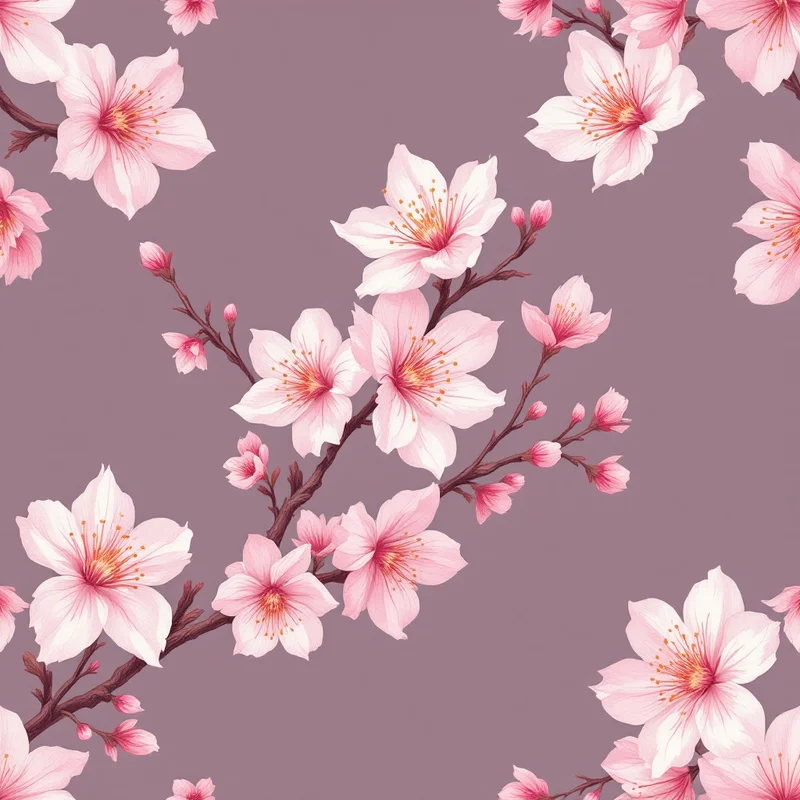
What a half-drop repeat actually is
A half-drop is a tile that shifts vertically by half its own height every time it steps sideways. Column one sits at y = 0. Column two sits at y = tile height / 2. Column three returns to y = 0. Column four returns to y = tile height / 2. The pattern continues that A-B-A-B alternation across the width of the fabric or wallpaper drop.
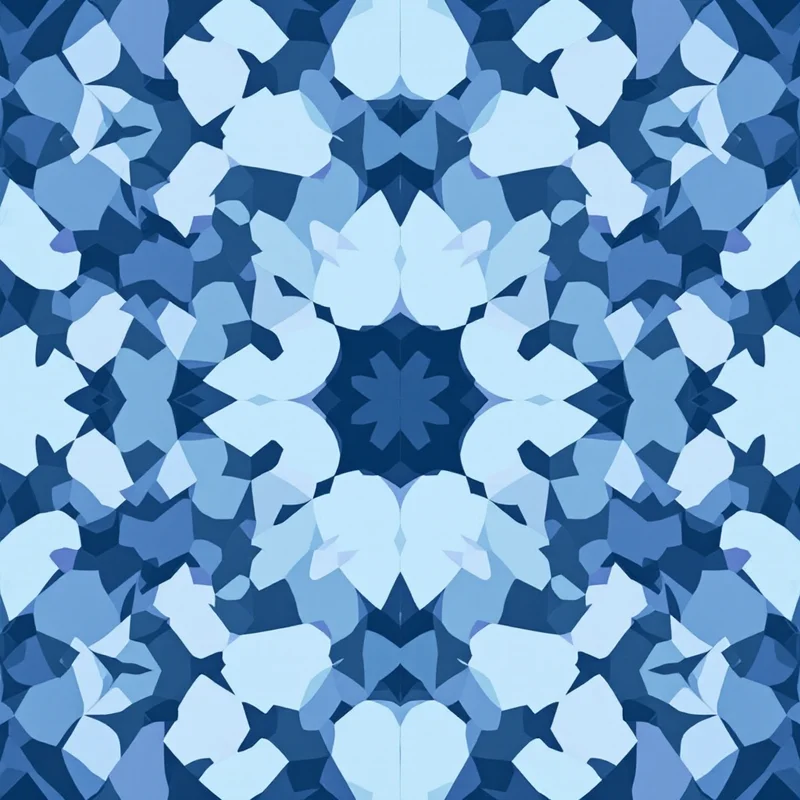
The reason this exists comes down to how the human eye reads grids. A block repeat — where the tile copies straight across and straight down with no offset — produces strong horizontal and vertical lines wherever the dominant motif lands. Even if every motif inside the tile is irregular, the corners of the tile align in a grid, and the brain finds that grid within about three seconds of looking at a swatch. Once you see it, you cannot unsee it.
A half-drop interrupts that alignment. Because every second column is shifted, the dominant motif in column two never lines up horizontally with the dominant motif in column one. The eye still finds rhythm — it has to, or the pattern would look like chaos — but the rhythm is diagonal instead of orthogonal. Diagonals feel organic. Verticals and horizontals feel manufactured. That is the entire trick.
The half-drop has a sibling called the half-brick, which does the same thing on the horizontal axis instead of the vertical. Same math, rotated ninety degrees. Some software calls these "drop" and "brick" without the "half" qualifier, but the half-drop is the default when textile people say "drop" without further description.
When to use a half-drop versus other repeats
Choice of repeat structure is driven by the motif, not by aesthetic preference. Get this match wrong and you fight your own pattern for the rest of the project.
Use a half-drop for:
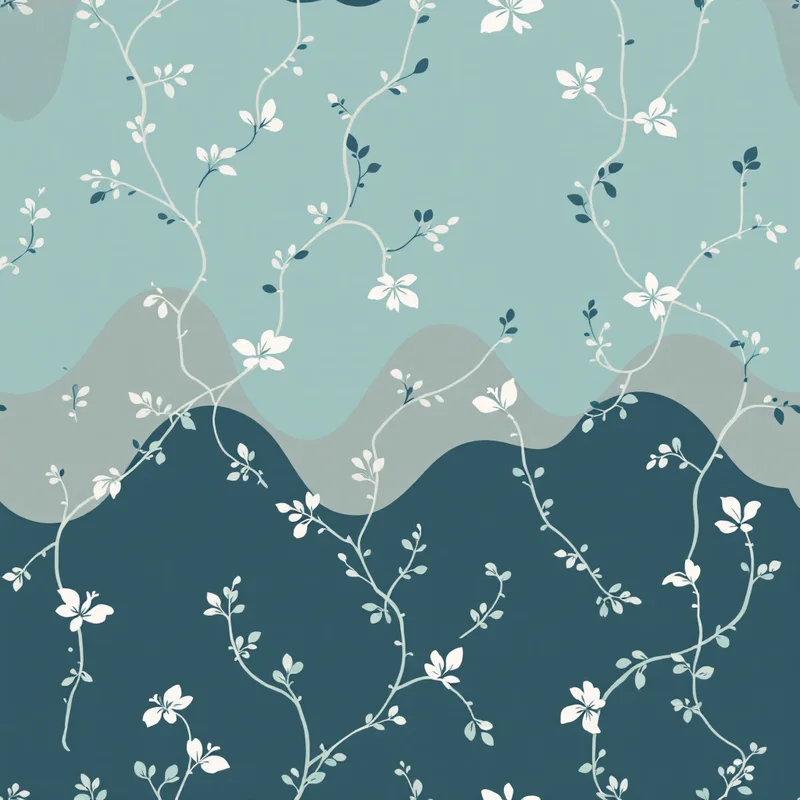
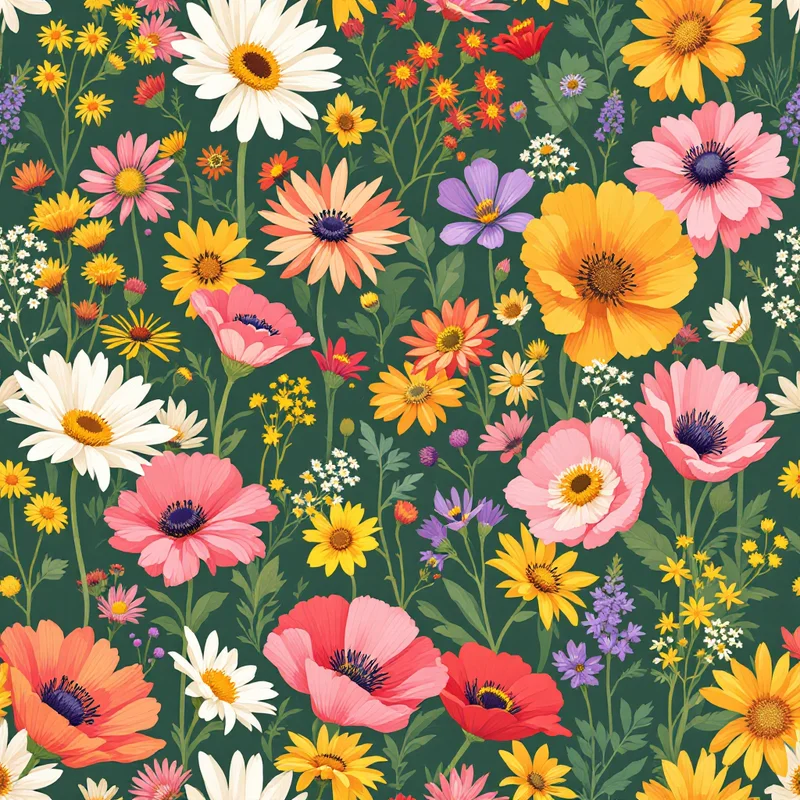
- Florals and ditsies. Anything with a dominant flower head, leaf cluster, or organic shape benefits from the diagonal flow a half-drop creates. The shift breaks up rows of identical blossoms that would otherwise stripe the print.
- Scenic and conversational prints. Birds, animals, small figures, fruits — repeating subjects that the eye latches onto. A block repeat turns them into wallpaper soldiers; a half-drop scatters them.
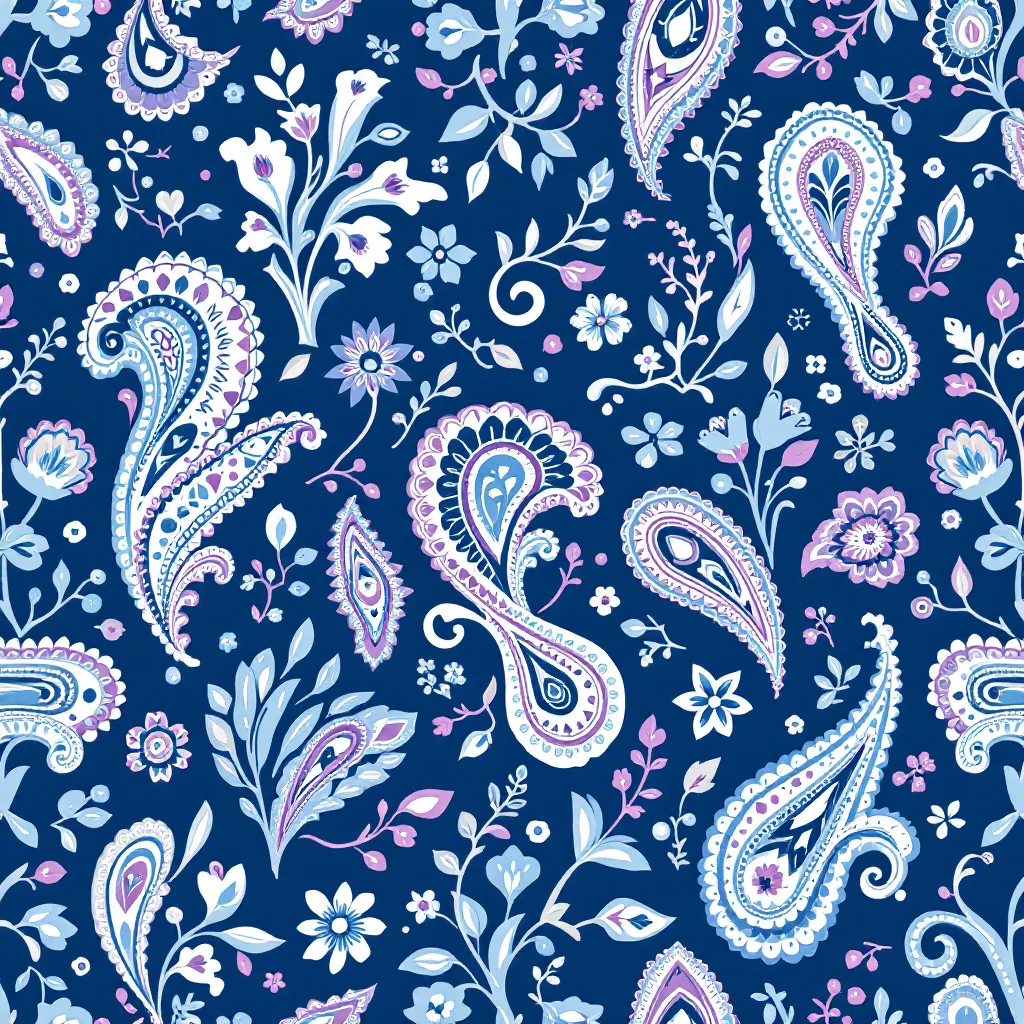
- Paisleys and traditional motifs. Most paisley layouts you see on scarves and dresses are half-drops. The teardrop shape itself has a natural diagonal lean that the half-drop amplifies.
Use a block repeat for:
- Tight geometric grids. Checks, plaids, tartans, lattice patterns, and most tile-inspired patterns. The grid is the point — hiding it would defeat the design.
- Stripes. Vertical or horizontal stripes are block repeats by definition; an offset would create staircase patterns.
- Logo prints and branded repeats. When the client wants the mark to read as a deliberate grid, you stay block.
Use a half-brick for:
- Architectural patterns. Anything that references actual brickwork, masonry, or tile. The horizontal stagger reads as construction.
- Wide horizontal motifs. Landscape-oriented shapes that already lean sideways — banners, ribbons, certain leaf forms — repeat more comfortably with a horizontal offset.
Use a diamond or half-drop-half-brick (also called a "tossed" layout) for:
- Dense all-over florals where neither axis should dominate. The diagonal grid created by offsetting both axes scatters the focal points more evenly than a standard half-drop.
Most production studios default to half-drop for anything organic and only deviate when the motif specifically demands a different structure. If you are not sure, start with half-drop.
The math
The offset for a half-drop is exactly half the tile height. If your tile is 1000 pixels tall, the offset is 500 pixels. If your tile is 12 inches tall, the offset is 6 inches. There is no other variable.
What trips people up is the difference between tile size and repeat unit. The tile is the rectangle you draw inside. The repeat unit — the full visual cycle of the pattern — is actually twice the tile height in a half-drop, because the pattern only fully resolves after the offset returns to zero. If you sell artwork to a fabric mill and they ask for "the repeat size," they usually mean the visual repeat unit, which means you give them the tile width and twice the tile height. Confirm with the mill which they want; getting this wrong sends a 12-inch print back as a 24-inch print.
The other math worth knowing: the diagonal that a half-drop creates has a specific slope. From the center of one motif in column one to the center of the corresponding motif in column two, the rise is half the tile height and the run is the tile width. That means a tile that is taller than it is wide produces steep diagonals, and a tile that is wider than tall produces shallow diagonals. Tile aspect ratio controls the visual angle of the print's diagonal flow — useful when a print is reading too "stripey" diagonally, because making the tile a bit wider flattens the angle.
Step by step in Illustrator
Illustrator's pattern feature handles half-drop natively, which makes it the fastest of the three options for vector work.
- 1Build the tile. Draw your artwork on a rectangular artboard that will become the tile. Do not worry about edge bleeds yet — Illustrator handles that.
- 2Select all the artwork including any background rectangle if you have one. If you do not want a solid background, leave background off; Illustrator does not require it.
- 3Object → Pattern → Make. This opens the Pattern Options panel and drops you into pattern editing mode. The artboard now shows ghosted previews of the tile around your working tile.
- 4Tile Type: Brick by Row. This is the dropdown that controls the repeat structure. "Grid" is a block repeat. "Brick by Row" is a half-drop. "Brick by Column" is a half-brick. The naming is unhelpful — Adobe calls the vertical offset "Brick by Row" because each row is offset — but the result is a true half-drop.
- 5Brick Offset: 1/2. This is the half in "half-drop." Setting it to 1/3 or 1/4 produces a third-drop or quarter-drop, which are less common but useful for certain ditsies.
- 6Drag the tile size handles in the working tile to set your tile dimensions. The ghost previews update live so you can see what the repeat looks like before committing.
- 7Move motifs across the tile edge by dragging them past the boundary. Illustrator wraps them automatically — what disappears off the right edge reappears on the left, what disappears off the bottom reappears on the top. This is how you get motifs to bridge the seam without manual offset tricks.
- 8Done. Click "Done" in the gray bar at the top. Your pattern is now a swatch in the Swatches panel.
To use the swatch, draw any shape and click the swatch as the fill. The pattern tiles automatically with the half-drop offset.
To edit later, double-click the swatch. To export a flat artwork file of the repeat, drag the swatch out of the Swatches panel onto the artboard.
For deeper coverage of pattern building inside vector workflows, the textile design overview walks through how repeat structures fit into the broader pipeline from artwork to print-ready file.
Step by step in Photoshop
Photoshop does not have a one-click half-drop the way Illustrator does. You build it manually using the Offset filter and Define Pattern. The workflow is longer but gives you tighter control over raster artwork like painted florals or scanned ink.
- 1Set up the tile canvas. File → New, with the dimensions you want for the tile. For a 12-inch print on fabric at 300 dpi, that is 3600 × 3600 pixels for a square tile, or 3600 × 4800 for a tile taller than wide.
- 2Paint or place your motifs on the canvas, keeping them well inside the edges for now. Do not let motifs touch the edges yet.
- 3Filter → Other → Offset. Set Horizontal to half the canvas width and Vertical to half the canvas height. Select "Wrap Around." This puts the edges of your tile in the middle, where you can see them, and reveals the seams.
- 4Paint over the seams. Wherever the artwork has been cut in half, blend it back together — clone, paint, or move motifs across the seam. This is the most labor-intensive step in any raster pattern workflow. Take your time.
- 5Reverse the Offset filter to put the canvas back where it started.
- 6For the half-drop step, you need a second copy. Edit → Select All, Edit → Copy. Then expand your canvas: Image → Canvas Size, double the height, anchor to top. Paste the copy and move it to the bottom half of the new canvas. Then offset the bottom copy horizontally by half the original tile width using the Move tool with exact numeric input.
This second-copy approach creates a tile that already contains the half-drop offset baked in, so when you Define Pattern, it tiles as block but visually reads as half-drop. This is the workaround for Photoshop's lack of native half-drop support.
- 1Edit → Define Pattern. Give it a name. It is now available in the pattern picker for fill layers and the Paint Bucket tool.
- 2Test by creating a large blank document and filling a layer with the pattern. Look for seams, repeating motifs in unwanted alignments, and any straight lines that betray the tile edge.
There is a faster method using smart objects and a 3x3 grid of linked copies, but the offset-and-define approach is the one that teaches you what is actually happening, which matters more than speed when you are learning.
Step by step in Procreate
Procreate added a pattern tile feature in version 5.3 that handles half-drop, though the interface buries it. The workflow is shorter than Photoshop's but less precise.
- 1Create a square canvas at the size you want your tile. Procreate caps canvas size based on device, so for an iPad Pro you can comfortably work at 4000 × 4000.
- 2Open Actions → Canvas → Drawing Guide, turn it on, then tap Edit Drawing Guide.
- 3Select 2D Grid and adjust opacity and thickness to taste. This is your reference grid, not the pattern itself.
- 4Paint your motifs keeping them inside the canvas for now.
- 5Use Actions → Canvas → Reference to bring up a reference window. Set it to show a tiled preview of your current layer. This is Procreate's live tile preview — it shows what your work looks like when repeated.
- 6For the half-drop view, the Reference window has a tile mode toggle. Switch it to half-drop and it shows the offset preview live as you paint.
- 7Handle the edges by painting across the boundary. Procreate does not wrap automatically the way Illustrator does, but the live preview shows you exactly where the seams fall so you can paint over them in real time.
- 8Export the tile as a PNG when finished. Procreate does not generate a pattern swatch file — you get a flat tile that you can import into Illustrator, Photoshop, or any printing partner's system.
Procreate is the fastest of the three for painterly work because you see the half-drop live while painting. It is the worst for precision because there are no numeric inputs — everything is freehand.
Common mistakes that break the repeat
Uneven offset. The offset must be exactly half. Eyeballing it produces a tile that looks fine on the artboard and falls apart in production. Always use numeric input. Drag-to-offset is fine for blocking out a design but never for the final tile.
Motif clipping at the edges. Motifs that are cut by the tile edge must align with their other half on the opposite edge. If a flower is cut at the top of the tile, the bottom half of that flower must appear at the top of the next tile up — which means it must appear at the bottom of your current tile, since the next tile up is identical to the current one. Same for left and right. In a half-drop, the left-right wrap is straightforward, but the top-bottom wrap interacts with the offset: a motif clipped at the top of column one matches a motif at the bottom of column one, not column two.
Scale that is too tight or too loose for the repeat to read. If the motif is too large relative to the tile, the repeat reads as a poster mounted side by side. If the motif is too small, the half-drop offset is invisible and the print looks like noise. A working rule for florals: the dominant motif should be about 1/4 to 1/3 of the tile width. Smaller for ditsies, larger for statement florals.
Background gaps. Negative space is part of the design. A half-drop only hides the grid if the background flows continuously across the seam. If you have a textured background, it must wrap the same way the motifs do, or the seam appears as a sudden change in background texture.
Forgetting to test at production scale. A pattern that looks great at screen size can fall apart when printed at full scale. Always export a 3 × 3 tile array at the actual production dimensions and view it at 100% or larger before sending to a mill or POD service. The fashion print design guide covers production-scale checks in more detail.

How AI pattern tools handle half-drop automatically
AI pattern generators handle the offset math invisibly. When you generate a seamless tile through an AI pattern generator, the output is already wrapped at the edges, and most platforms — including Pattern Weaver — produce tiles that work as block, half-drop, or half-brick depending on how you apply them. The repeat structure is a property of how the tile is laid out, not of the tile itself.
What this means in practice: you generate a tile through a fabric pattern generator, download it, and decide at layout time whether to use it as block, half-drop, or half-brick. The same tile produces three different visual rhythms depending on which offset you apply.
This is also why testing matters more, not less, with AI-generated tiles. The tile itself is seamless, but the choice of repeat structure changes what the pattern feels like at fabric scale. A floral that looks soft as a half-drop can look aggressive as a block. Always test all three layouts before settling on one.
For workflow integration with print-on-demand and fabric services, the design patterns for Spoonflower walkthrough covers how to upload and preview tiles in repeat. The surface pattern design overview covers home goods applications where repeat choice has the biggest visual impact at scale.
Testing the repeat: the 3x3 method
Every pattern goes through the same final test before it leaves your studio:
- 1Create a new document at three times the tile width and three times the tile height.
- 2Tile your pattern across the full canvas — either by filling with the pattern swatch, or by manually placing nine copies in a 3 × 3 grid with the correct half-drop offset.
- 3Zoom out to fit the canvas in your screen.
- 4Look for three things:
- Seams. Any horizontal or vertical line where the tile edges are visible.
- Hot spots. Any motif that catches the eye more than the others, indicating uneven distribution.
- Tracking. Any unintentional diagonal or vertical line of similar motifs that the eye reads as a row.
- 1Squint at it. This eliminates color and detail, leaving only the value distribution. Hot spots and tracking show up more clearly when squinted at than when viewed sharp.
- 2Rotate the canvas 90 degrees and squint again. A pattern that works rotated is much more flexible in production than one that only works in one orientation.
If the pattern passes all three checks, it is ready. If it fails any, the fix usually involves moving motifs across the tile boundary or adjusting scale — rarely starting over.
For designers building libraries of patterns for clothing design or textile designer portfolios, this test becomes muscle memory after the first dozen patterns. It is the difference between a pattern that ships and one that comes back from the mill with notes.
The half-drop is the workhorse for a reason. Master the offset math, learn to see the seams before the production team does, and the rest of the repeat structures fall into place — because once you understand why the half-drop hides the grid, you understand exactly when to use the others to expose it on purpose.
Explore related pattern styles
Patterns for