
Adobe Illustrator's Pattern Options panel revolutionized seamless pattern creation, making the process dramatically faster and more precise than the old manual nine-square method. Rather than hand-blending seams and guessing at repeats, Illustrator shows you in real-time exactly how your pattern will tile. This shifts the workflow from tedious adjustments to creative iteration.
The catch: the panel's flexibility can confuse beginners. Understanding tile types, overlap, spacing, and offset transforms you from someone clicking buttons to someone controlling repeats intentionally.
Setting Up Your Artboard
Before creating a pattern, establish your artboard with realistic dimensions.
Creating a New Document
Launch Illustrator and create a new document. For pattern work, your artboard size should match your desired pattern repeat size, which depends on application:
- Small geometric patterns: 4-6 inches square
- Medium motif-based patterns: 6-10 inches square
- Large textile patterns: 12-18 inches square
- Wallpaper: 24-27 inches (one wallpaper roll repeat standard)
Go to File > New, set dimensions in inches, and use RGB color mode (CMYK if designing for professional printing). Pattern size doesn't constrain your design—you can always scale later—but starting realistic helps you visualize the final repeat.
Adding Bleed Space (Optional but Recommended)
For complex patterns, some designers add bleed area outside the artboard boundary to work on seam continuity without edge restrictions. This is optional but helpful.
Draw a rectangle slightly larger than your artboard (5-10% extra), and note its coordinates. This becomes your working boundary. Elements crossing the edge will show their wrapped position in the pattern preview, making seam alignment visible.
Creating Your Pattern Elements
Now design the actual pattern motifs. This is where creativity lives—color, shape, scale, and complexity are your choices.
Design Principles for Seamless Patterns
Several principles improve your results:
Avoid placing critical elements at artboard edges. If a flower blooms right on the edge, when the pattern repeats, you'll see a hard seam where two flowers meet awkwardly. Instead, position main motifs away from edges.
Plan for wraparound. If a motif crosses an edge, its continuation appears on the opposite edge. This is automatic in pattern mode, but you need to account for it during design. An element cut at the left edge reappears at the right edge. Design knowing this will happen.
Use guides for tile boundaries. Object > Guides > Make Guides (or Ctrl+5) turns your artboard rectangle into visual guides. This helps you see exactly where the tile boundary is while designing.
Consider negative space intentionally. The space between motifs is part of the pattern. Uniform, balanced negative space reads as intentional. Chaotic gaps read as a design error.
Entering Pattern-Editing Mode
Once your pattern elements are created and positioned on your artboard, it's time to formalize them as a pattern.
The Essential Step
Select all the pattern elements. Use Ctrl+A (Cmd+A on Mac) to select everything on the artboard, or manually select your motif group.
Go to Object > Pattern > Make (or Path > Pattern > Make in some Illustrator versions). Alternatively, right-click your selection and look for "Make Pattern" in the context menu.
Illustrator opens a dialog confirming a new pattern has been created and added to the Swatches panel. Click OK. You've now entered Pattern-Editing Mode.
Understanding Pattern-Editing Mode
The canvas now shows your pattern tile (the original artboard area) with reduced-opacity repeats surrounding it. This preview is dynamic—as you edit elements, the repeat preview updates in real-time.
You'll see:
- A white rectangle (your tile boundary)
- Your pattern elements inside it
- Ghosted repeats of your pattern around the tile (in gray)
- A "Pattern" label in the top-left corner of the window
This mode is your design environment until you exit. Do not exit prematurely—all your edits happen here.
The Pattern Options Panel
The Pattern Options panel appears when you enter pattern-editing mode. If it's not visible, go to Window > Pattern. This panel controls how your pattern repeats.
Tile Type
The Tile Type dropdown determines how tiles connect:
Grid: Standard rectangular tiling. Tiles butt edge-to-edge in a grid arrangement. This is the most common choice.
Brick: Tiles offset by 50% horizontally on alternating rows. This mimics brick walls—each row shifts half-tile. Brick layouts disguise seams better than grid for certain patterns (checks, stripes).
Brick Horizontal: Offset by 50% vertically instead, useful for vertical stripe patterns.
Hex (Hexagonal): Tiles arranged in a honeycomb pattern. Useful for hexagonal or radial motifs.
These tiles don't change your artwork—they change how tiles repeat. A diamond-shaped motif in grid layout repeats differently than in hex layout.
Start with Grid. Experiment with Brick if your pattern feels seamed in a grid layout.
Width and Height
These fields show your tile dimensions. You can adjust them to scale the pattern without scaling individual elements.
Width: 4 inches, Height: 4 inches (for a square pattern) Width: 6 inches, Height: 4 inches (for a rectangular pattern)
Changing these values doesn't resize your artwork—it redefines what counts as one "tile." Increasing width makes tiles larger, which effectively scales up your pattern in final production.
H Spacing and V Spacing (Horizontal and Vertical Spacing)
These fields add gaps between tiles. Positive values create space between repeats. Negative values create overlap.
For seamless patterns, you typically leave these at 0 (no gap, tiles touch edge-to-edge). But some patterns benefit from deliberate gaps, creating a border or frame effect. Experiment with small values (0.1-0.5 inches) to see the effect in the preview.
H Offset and V Offset
These shift the tile position relative to its grid. Offsets are useful for patterns where the seam line benefits from being moved.
Say your pattern has a diagonal stripe. By default, the seam is vertical and horizontal. With H Offset, you can move the seam to a diagonal, disguising it better.
Most patterns leave offsets at 0. Use offsets when you see a seam you want to relocate.
Creating Your Pattern: Practical Workflow
Let's walk through a concrete example: a simple geometric pattern with circles.
Step 1: Design the motif
Create 2-3 circles in different sizes and colors, positioned across your artboard. Make sure the rightmost circle is not touching the right edge (leave 0.5 inches of space).
Step 2: Enter pattern mode
Select all (Ctrl+A), then Object > Pattern > Make. You're now in pattern-editing mode.
Step 3: Check the preview
Look at the ghosted repeats around your white tile. Do the circles tile nicely? Do they create interesting clusters? Do seams feel hidden or obvious?
If the preview looks good, continue. If you see hard seams or awkward gaps, make adjustments.
Step 4: Adjust if needed
Click an element to edit it. Move, resize, or recolor it. Watch the preview update in real-time. This is why pattern mode is powerful—instant feedback.
Common adjustments:
- Move a circle that sits right on a seam away from the edge
- Adjust spacing so circles almost touch without overlapping
- Change color to create rhythm
Step 5: Exit pattern mode
Click the X on the "Pattern" label in the top-left (or choose Object > Pattern > Exit Pattern Editing). You're back in the main canvas.
Your pattern is now a swatch in the Swatches panel. It can be applied to any shape.
Common Mistakes and How to Fix Them
Mistake: Motifs cut awkwardly at seams
Symptom: When you view the pattern preview, motifs meet abruptly at tile edges, creating visible seams.
Fix: During design, position main motifs away from edges. If a motif must cross an edge (say, a large flower), ensure its continuation on the opposite edge aligns naturally. The pattern preview shows this wraparound, so use it to guide positioning.
Mistake: Unintended gaps
Symptom: Your preview shows white space or gaps where tiles meet.
Fix: Check your artwork for unintended empty areas. Use negative space intentionally—if gaps appear chaotic, they'll read as design errors. Make gaps regular and balanced.
Mistake: Forgetting to select all elements before making the pattern
Symptom: You make a pattern, but some elements are missing from the tile.
Fix: Before Object > Pattern > Make, ensure all your motifs are selected. Use Ctrl+A to select everything.
Mistake: Edited the pattern after creation without entering pattern-editing mode
Symptom: You made changes to elements, but they don't appear in the pattern when you apply it.
Fix: Apply the pattern to a shape and view it. If changes didn't register, go back to the Swatches panel, double-click the pattern swatch, and re-enter pattern-editing mode to make adjustments. Or right-click the swatch, choose "Edit Pattern," and the pattern-editing mode reopens.
Fine-Tuning Your Pattern
Adjusting Spacing and Overlap
Once your pattern is tiling, you might want to adjust how tightly tiles pack or whether they overlap.
Re-enter the pattern (double-click its swatch in the Swatches panel). In Pattern Options:
- Increase H Spacing or V Spacing to add gaps between tiles (useful for framed patterns)
- Use negative spacing or adjust Tile Width/Height to create overlap, making the pattern feel more connected
Changing Tile Types
Swap Tile Type from Grid to Brick and watch the preview. The layout shifts. This is one of the most powerful controls—the same motifs arranged in a different tile pattern look completely different.
Brick is excellent for disguising seams in linear or geometric patterns.
Applying Your Pattern
Once satisfied, exit pattern-editing mode. Your pattern is now in the Swatches panel.
To use it, create any shape (rectangle, circle, polygon, or custom path) and click the pattern swatch. The shape fills with your pattern.
You can also drag the pattern swatch onto the canvas as a direct fill for an object.
Exporting Your Pattern
You have several export options depending on your end use.
For Seamless Tile (Single Repeat)
The pattern is already created. To export just the single tile as a seamless image, create a rectangle the size of your tile, apply the pattern fill, then go to File > Export As, choose PNG or TIFF, and export. This creates a single-tile image suitable for print-on-demand services.
For Full Pattern Swatch
Some users want to see the pattern with multiple repeats (say, a 3x3 grid of tiles). Create a larger rectangle, apply the pattern, and export. This is useful for showing clients how the pattern repeats.
For Web or Print
Export as SVG (for vector, scalable), PNG (for raster at a specific resolution), or TIFF (for archival/print).
Always export at your target DPI:
- 300 DPI for print
- 150 DPI for Spoonflower or print-on-demand
- 72 PPI for web
Advanced: Pattern Libraries and Batch Editing
Illustrator lets you save pattern libraries, useful if you create many related patterns.
Go to the Swatches panel menu (small arrow icon top-right) and choose "Save Swatch Library as AI Library." This saves all your current swatches (patterns included) for future documents. Load them in new files to maintain consistency across pattern collections.
Comparing Illustrator's Approach to Older Methods
The nine-square method (still taught in some contexts) requires:
- 1Create a tile on a small artboard
- 2Copy it 9 times (3x3 grid)
- 3Manually blend seams where tiles meet
- 4Select the center 9 tiles and align/merge
- 5Extract the center tile as your repeat
This is error-prone and tedious. Illustrator's Pattern Options eliminates the manual work—the software handles the tiling math, and you focus on design.
If you've used the nine-square method elsewhere (or with other tools), Illustrator's approach will feel dramatically faster.
When to Use AI Pattern Generators
If you're using an AI pattern generator like Pattern Weaver, the pattern creation is handled automatically. You select style, colors, and composition, and the tool generates a seamless tile ready to export. This is ideal for rapid prototyping or when you want to explore design directions quickly.
For complete creative control and integration with other Illustrator workflows, manual creation in Pattern Options remains the professional standard. AI generators are excellent for iteration and inspiration but may not offer the precise customization advanced designers need.
Final Checklist
Before finalizing your pattern:
- Pattern displays cleanly in preview with no visible seams
- Motif placement is intentional, not accidental
- Spacing is balanced and consistent
- Color palette is cohesive
- Pattern tiles at least 3x3 in the preview without errors
- Tile size is appropriate for intended use (not too large, not too small)
- You've tested at least two tile types (grid and brick) to compare
Once checked, your pattern is production-ready.
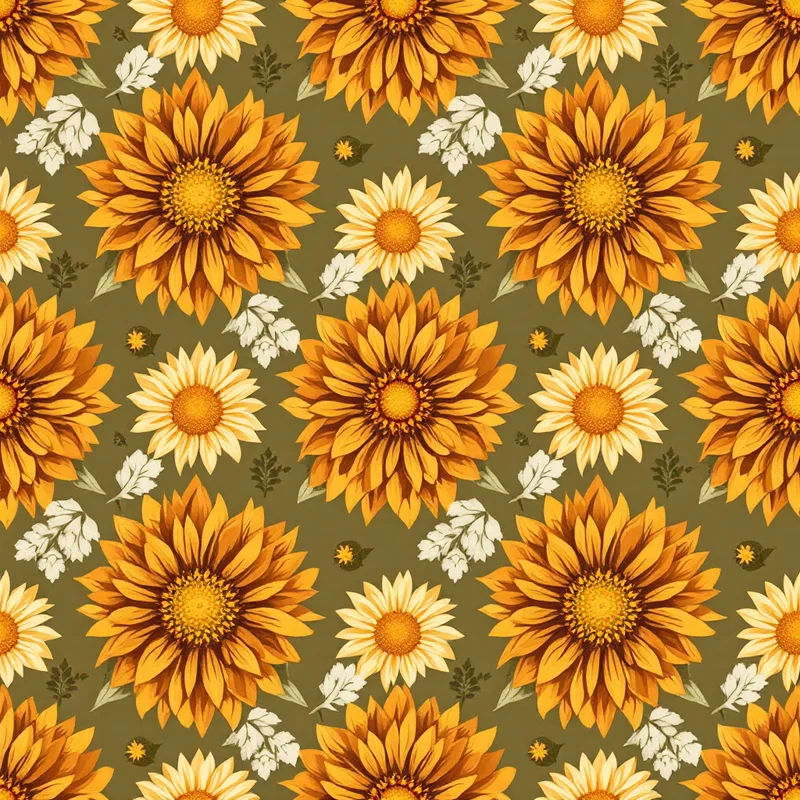
Explore related pattern styles
Patterns for